Showing posts with label heirloom vegetables. Show all posts

Tuesday, September 11, 2012

Cooking with Heirlooms: Patty Pan Pizza


I might have the best job in the world. The other day at the end of the workday, my mother comes to me, in her hands this gorgeous green thing – Benning's Green Tint Squash – a perfect patty pan squash. “Would you like to take this home?” she asked. Do I want to take it home? Has she met me? Of course I do!

Side note: When I first started working here, I stood before the wall of 700 varieties of seed, trying to fill an order for Cocozelle Zucchini. Minutes passed and I was frustrated (patience was never one of my virtues), “Where is the zucchini?” I called out. “It's in the summer squash.” my mom called back. Well, that doesn't make any sense, I thought to myself. At least another month would pass before it was explained to me that summer squash and zucchini were the same things. Oh dear.

Back to the patty pan squash. If you've never seen these before, you'll be amazed. They are beautiful, colourful round squashes with scalloped edges. “What do I do with it?” I asked her. “Well, I usually chop it up in a stir-fry. What else do you think we could do with it?”

With our creative thinking caps on, we came up with the Patty Pan Pizza.

Ingredients

1 Patty Pan Squash, sliced into ¼ inch thick pieces.

¼ Teaspoon Extra Virgin Olive Oil

2 Small Heirloom Tomatoes (I used Morden Yellow and Pomme D'Amour)

1 Heirloom Sweet Pepper (I used Marconi Red)

¼ Cup Extra Old Cheddar Cheese (Mozzarella could work too – but this cheese is my personal favourite)

2 Tablespoons Parmesan Cheese

1 Teaspoon Summer Thyme

… and any other pizza toppings that suit your fancy! I added Montreal Smoked Meat to mine for a bit of a protein boost.

Directions
  1. Preheat oven to 375 c
  2. Lightly grease a baking sheet with olive oil
  3. Lay squash slices out on baking sheet
  4. Add your toppings
  5. Cook for 10 – 15 minutes, or until cheese is slightly browned.
  6. Remove from oven – enjoy!


    Follow Me on Pinterest

Saturday, August 4, 2012

It's Tomato Hornworm Time!


It's Tomato Hornworm Time!

I spotted my first tomato hornworm the other day – oh joy of joys. Well, actually, I only spotted it after Dan pointed it out to me; he's got the eagle eyes in the family and you sure need sharp visual acuity to find those little devils. Not so “little” really – at up to 4” (10 cm), tomato hornworms are one of the largest insect pests you'll deal with if you live in southern Ontario and Quebec. 


Even though they're big and scary looking, I always feel somewhat conflicted about taking them out. You see, the tomato hornworm caterpillar is the larva of the hummingbird moth (Manduca quinquemaculata), which I happen to really like. I really like my tomato plants alive and bearing fruit, too, so I apologize to the caterpillars as I eliminate them because you can't have both.

The moths emerge from the soil in spring after they've overwintered. They lay their eggs on the leaves of host plants and, after a few days, the larvae emerge and start eating voraciously for the next four weeks. They then bury themselves in the soil to start the cycle again. The larvae that hatch from the second generation of moths eat into the fall and then burrow into the soil to overwinter in cocoons.

Although they're most commonly called tomato hornworms, these caterpillars actually feed on any of the members of the solanaceae family, including peppers, potatoes, eggplants and nightshade. Tomatoes are their favourites – they eat the leaves and stems, as well as both the green and ripe fruit. Left alone, they can destroy a plant in a number of days. This is why they're considered so destructive and why we need to be constantly checking for them starting around now. You know you have hornworms if you notice whole branches of your tomato plants have been stripped bare of leaves, or if you see their telltale clusters of brown/black droppings on lower leaves. The caterpillars themselves are green (I have also found black ones) with white v-shaped lines on their sides and a black horn on their tail end. This horn looks dangerous but it doesn't sting. They blend in well with the plants, often hanging upside down along a stem, and I have to train my eyes to find them each season. They really are quite frightening the first time you encounter them, and these guys have attitude. Often, when I try to pick them up, they'll rise up and threaten to attack me, making a clicking sound.

Because hornworms dislike the heat of mid-day and will rest in the lower levels of the plants, the best time to look for them is at dawn or dusk, when they're feeding on the upper stems. Hand-picking them, although tedious, is the best way to get rid of them. Disposing of them can be done by squishing them with your (booted) foot (Dan's preferred method), cutting them in half (ugh!) or dropping them in a container of soapy water (my choice). Parasitic wasps can help you out: they lay their eggs on the larvae and their young feed on the host hornworm and then pupate in white cocoons on its back. So, if you find a hornworm with a lot of what look like pieces of rice on it, leave it alone. Those wasps, when they hatch, will also feed on other hornworms in the vicinity.

A couple of prevention techniques include tilling the garden well in the late fall and spring to unearth the pupae and planting marigolds, borage, basil or dill as companion plants. We now till our gardens every fall and have noticed a significant decline in the number of hornworms munching on our tomatoes in the last few years. They can still cause a fair amount of damage, though, so it's off to the garden every day to do our check.

Follow Me on Pinterest

Monday, July 23, 2012

Plant Profile: Good King Henry


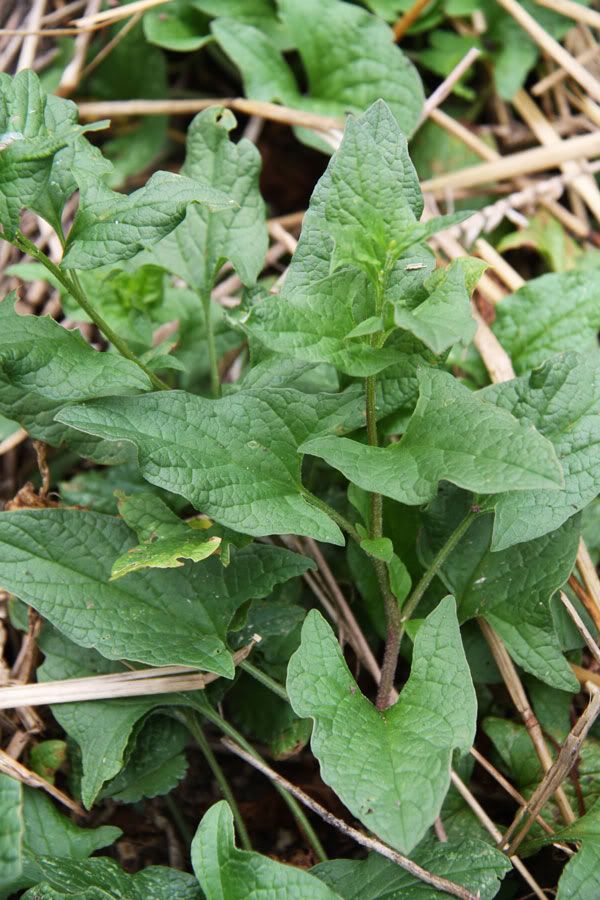
Good King Henry (Chenopodium bonus-henricus)

I'm really excited to have harvested our first organic seed crop from our Good King Henry plants! Here are some interesting facts about this rarity of rarities in cooler climes - a perennial vegetable.


Despite its illustrious name, this venerable plant served the peasant class in Europe for hundreds of years. Known also as" Poor Man's Asparagus"," Lincolnshire Spinach", "Allgood", "Fat Hen", "Smear-wort" and "English Mercury", it was valued as a spinach and asparagus substitute and pot-herb. Its species name means “goosefoot”, which refers to the shape of its leaves, and it's related to other edibles such as Lamb’s-quarters (C.album), quinoa (C. quinoa) and StrawberrySpinach (C. capitatum).

Although it was a garden staple in much of Europe from the time of the Romans, it fell into disuse by the early 1900's. However, with the recent surge of interest in home vegetable gardens and slow cooking, it's time to take another look at this plant: it's a perennial vegetable (to Z 5), is relatively easy to grow and largely resistant to pests and diseases. Its common name is believed to have originated in Germany as simply “Good Henry”, meant to distinguish it from “Bad Henry”, a toxic plant found in the wild.  “King” seems to have been added when it came to England (no-one knows quite why) and many myths developed around the source of its names, including that it was named after Henri IV of France, who had promised every peasant a chicken or fat hen in his pot. “Fat Hen”, by the way, referring to its use as poultry feed, is actually a misnomer – it's meant to apply to its cousin, Lamb's-quarters, which were the species used to fatten poultry. The second half of its botanical name translates simply as“good henry” - although the bestowed royal connections may have appealed to the commoner's fancy.

Prized as one of the first greens to emerge in spring, its young shoots were harvested, peeled and cooked like asparagus and the leaves were picked regularly for use as a pot-herb. So important was it considered that European colonists brought it to North America with them to establish in their new gardens.

Growing to about 12” high and 18” across, it first produces young shoots in early spring that can be harvested when pencil-thick and cooked like asparagus. The dark-green, triangular leaves next appear and can be continually harvested, although older and later leaves tend to be more bitter. We have discovered why it was so popular as a pot-herb, as even the young leaves are a bit too bitter for fresh eating for us. Why fight history? The peasants had it right – so cook it as you would spinach or stir-fry it as we do. The bitterness can be reduced by soaking the leaves for a half hour in salted water, then discarding the water. They are especially rich in Vitamin C, calcium and iron, so they're a great addition to your diet.

Like most ancient garden plants, Good King Henry also had medicinal uses. According to “A Modern Herbal”, written by M. Grieve in 1931, it had “excellent remedial qualities in indigestion” and the seeds were considered to have a mild laxative effect.All parts of the plant were used. The name “Smear-wort” comes from its use in ointments and the leaves were regularly made into poultices to clean and heal chronic sores. Gerard, in the 16th C., wrote that these poultices “do scour and mundify” sores resistant to healing ("mundify" - what a great word! It means to cleanse - I'm going to try and work that into my vocabulary). The roots of the plant were even used to feed to sheep to cure coughs.

Since it is a perennial, Good King Henry is best planted in rich, fertile soil that has been well-worked with good drainage. We have ours in full sun and it has flourished although it can also handle partial shade. Growing it from seed can be a challenge as it is a slow, erratic germinator. Moist-stratifying the seeds for several weeks before sowing increases germination rates. It doesn't like to be transplanted, so sow it where you mean to grow it. Like many plants that are trickier to germinate, they self-seed quite readily once established. This is a good thing, since we have found that in our Zone 5b garden it can tend to be a short-lived perennial. Direct sow in the garden and thin to 2' apart and don't harvest anything the first year – just let the plant work on getting established. Shoots should not be harvested until the plant is three years old. The fairly nondescript flowerheads are produced in abundance and if you leave some to dry on the plant you can gather your own seeds fairly easily. All members of the Chenopodiaceae family are outbreeders and wind-pollinated, meaning they have to be isolated by several miles to ensure varietal purity. However, Good King Henry is the only known variety in its species so saving pure seed should not be a problem. Wait until the seedheads are completely dried before harvesting the tiny black seeds.We just run our hands up the stalks and the seeds, if ready, easily come off into our hands. Cleaning the seed is easy - just blow off any chaff.


Follow Me on Pinterest