Saturday, September 6, 2014

How To Save Tomato Seed


Bonny Best tomato
Tomato seeds are often gardeners' first foray into seed saving. If you've found a variety or two that you really like or that are hard to find, you may want to save some seeds to ensure they continue to be part of your garden. It is not difficult to save tomato seeds but there are a few important steps to the process.

First of all, you have hopefully planned for seed-saving when you planted your garden and have ensured that the varieties you want to save are sufficiently isolated from the rest of your tomato crops. “Sufficiently isolated” is a tricky and contentious term amongst tomato seed-savers: some people swear that they can grow different varieties of tomatoes side-by-side and have no cross-pollination; others advocate separating seed varieties by 150 ft or more. The key is the shape of the tomato flower. Although considered self-pollinating, tomato flowers can have their stigmas protruding past the anthers and, in these cases, they can be fairly easily cross-pollinated by insects visiting from plant to plant. To be safe, home gardeners saving seed just for themselves should distance the tomato varieties from which they intend to gather seed by at least 10 ft from other varieties.

Tomatoes are harvested for seed at the same time you would harvest them to eat – when they are fully ripe. Choose fruits that are most representative of the specific variety and harvest fruit from several plants to capture the best genetic profile. Next comes the fun part – fermentation! This removes the germination-inhibiting gel from around the seeds. It's a little messy and a little stinky, but increases germination substantially so it's well worth it.

Cut up ripe tomatoes into quarters and place them in a container. If you'd like to save the flesh for cooking, you can just squeeze the seeds and surrounding gel from the tomatoes into the container. Add enough cold water to cover the tomato mixture and stir well.
 Place the container in a cool, out of the way spot – you may want to put it in a really out of the way spot, as it does get quite smelly during the fermentation process. If desired, you can put a cloth over the container. Whatever you do, make sure you label the container with the name of the tomato, especially if you are saving seeds from more than one variety (they all look pretty similar when they're mashed up!). Over about three days, the tomato mixture will form a white, foamy “crust”; when the crust covers the entire container, your tomato mixture is ready for the next step.

Large jugs of tomato seed waiting to be cleaned

Skim off the crust and scoop out a lot of the tomato flesh that's at the top. Then pour most of the water out – the good seeds will have settled to the bottom. Add clean water and then pour that out. Continue to do this until all you have left is clear water with a layer of clean seeds at the bottom

. Pour off as much of the water as possible and put the seeds in a suitable place to dry. We have found that it's best to dry tomato seeds as quickly as possible or they'll start germinating – and as much as we appreciate their eagerness, they need to wait until the following spring! Dan's favourite method is to place the seeds in a plastic sieve and place the sieve in front of a fan. The fan, blowing at medium strength, should dry the seeds in a matter of hours. Do not use a metal sieve; it will blacken the seeds. This doesn't affect their viability but it makes them look ugly. You can also spread the seeds out in a single layer on a cookie sheet or plate – please don't use paper towel; the seeds will stick to it after they've dried and you'll have a devil of a time getting all those little bits of paper off.


When the seeds are completely dry, store them in a glass jar or paper seed envelope, label clearly, date and keep them in a cool, dark, dry environment until you're ready to plant next spring.

Tuesday, June 24, 2014

How Does Our Garden Grow?

Our property is ideally suited for seed production. Ten acres in total, it is heavily treed - conifers rim the entire property, there's a two-acre wood at the back and trees & shrubs dot the remaining acreage. This has enabled us to create a dozen seed-beds scattered about the place. Tucked in amongst the trees, shrubs and wildflowers, they enable the isolation of seed varieties from each other so as to keep them from cross-pollinating. This has worked well for us for a number of years, but as our need for larger quantities of seed has increased, we've run out of pockets to plant. We love and honour the trees but they do make it a challenge to find enough large, full sun space.
Some of our raised seed beds with the perennial herb garden in the background. 


Our Elfin Glade – a carpet of ferns flourishes beneath the protective canopy of the trees. (I'm quite sure this is where the faeries live.)


What to do? Use someone else's land! The opportunity came up this year to lease two acres of the neighbouring farm. Unused except for grazing for the last 40 years, it was able to be certified organic and positions us to be able to produce much more of our own seed. And, boy, does it have sun! With hardly a tree in sight, it is a stark contrast to our little bio-diverse nature sanctuary, but the space is much appreciated. 
Into the Woods - The gate we made to join the two properties runs through our two-acre woods. This is looking into it from the neighbouring farm.

We're using it this year to grow tomato and bean crops, interspersed with lots of other veggies for our own home use. Squash and sunflowers are being planted to distract pollinators with their large, beautiful flowers. 
The east end of the main garden next door – it's 500 ft. long. We've installed trellises for our tomato plants around the perimeter; beans are planted down the middle. This is the first time we've tried trellising our tomatoes - usually we just let them grow. We're interested in observing any differences in productivity and plant health. Note the mud – like our land, this field has a high water table and the recent heavy rains have had a significant impact. Dan keeps trenching it but it makes for tough slogging to work in it right now.

We hope that the combination of the two properties will meet our seed-production needs for the foreseeable future!


Friday, March 21, 2014

In the Midst of Winter, How Does Your Garden Grow?

“In the midst of winter, I found there was, within me, an invincible summer.”
- Albert Camus


I’m staring at a stick, poking up from a foot of snow. I think it used to hold ground cherries. Now it’s bare and stripped. This is the first time I’ve pulled my boots on, bundled up and headed out into the backyard to see what toll the raging winter has taken on my first garden.

I can make out the brief outline of the garden beds I painfully built last summer. Now they hold a delightful box of snow and dirt. “At least those walls held up,” I think.

It is bittersweet to look upon the garden. Part of me is filled with hope and potential. New season, new varieties to choose and new bounty to collect. “I’d love to grow Achocha this summer. I’ll stuff them with cheese.” Another part of me is melancholic. A muscle memory stirs - both figuratively and literally, cause I moved an awful lot of bricks to build these beds. But I created this garden with my husband, from whom I am now separated. Our house - our garden - is now on the real estate market. The thaw is coming, but I haven’t decided where I’m going. Will I have some green space come summer?

I laugh a little, thinking about my new garden and what I might grow. What would be appropriate for this transitory time in my life? “Lazy Housewife Bean,” I snort to myself. “Love Lies Bleeding, Moneymaker Tomato, Double Standard Corn, Red Self-Heal and Heartsease.”

I walk back to my sliding glass door to return to the warmth. My cat Rogue is ready to make a break for it as I put my hand on the door handle. “It’s spring,” she must be thinking, “let me out! I’ve been cooped up in here with you all winter!”

The next day, I’m telling my mother over a farmer’s lunch of pickled eggs and stew about my proposed garden plans. Her eyes narrow slightly - something she does when she’s choosing her words carefully - and she half-smiles. “That’s a bit of a cynical garden, don’t you think?” I teasingly ask if she had a better idea. “Cupid’s Dart. Love-in-a-Mist.” she shoots back. Point taken, Mum. Dad pipes in now. He’s jazzed and thinks we should make a new collection. “What, like the The Single Girl’s Garden Collection?” He’s chasing this idea now and wonders how to make it. “It’ll be great,” I say, egging him on. “I mean, each packet only needs one or two seeds, right? You’re only cooking for one.” He laughs, but then stops to honestly consider it. “Not happening.” Mum says, putting a much needed period at the end of all this tomfoolery.

But the conversation gets me thinking. Just like in The Secret Garden, all I want is a little bit of earth to plant a seed and watch it grow (I’m definitely singing this song in my head right now as I type this). A touch saccarine, maybe even cliche, but the thought of planning my next garden - wherever it will be - is an exciting one. I am looking forward to Celeriac Soup, with ingredients from my own green space like Evergreen Bunching Onions and Purple Top White Globe Turnips. And you know what? Forget the Forget-Me-Nots. Because gardening can be my therapy - along with wine, coffee and chocolate. So in the midst of all my Aunt Molly’s Ground Cherries, I’ll sneak in a Sweet Chocolate Pepper.


- Rachel


Monday, January 28, 2013

I'd Hack That!


I'm a food hacker. I love to take a dish and find out how I can hack it into healthfulness.  With the myriad of diseases and food "sensitivities" (which sounds so delicate, but we all know what ugly terror these little sensitivities bring) that are plaguing us humans, we've all been forced to get a little creative with our dinners. The other night, I successfully (read: didn't burn it, totally ate it) hacked a Shepherd's Pie - I substituted the ground beef for mushrooms and edamame and changed the mashed potatoes to mashed cauliflower and turnip. It was delicious! I honestly believe you don't have to "miss" anything when you change the way you eat. Any favourite recipe can be hacked. I've included some of my favourite recipes that I've collected from our Pinterest board that offer a different take on a classic dish.

Spinach Burgers 
(or Spurgers, maybe...? No? Come on...)


Let's be honest. I like me a good ol' fashioned burger. I'm pretty sure the folks down at Five Guys Burgers know me by toppings "No onion? Extra mushrooms? Welcome again, my friend."  But there is only so much I can take before the chronic meat sweats kick in. That's why I love these Spurgers. Yes, I will keep using that term until you use it too. 


Spaghetti Squash Boats with Meatballs 
(or "Cheatballs", using Quinoa or Veggie Ground Round)


Where I grew up, there was a stream that ran the length of the street where our home was located. Every spring, when it thawed, my family had the Annual Spaghetti Boat Run. My brother and I would take hollowed out spaghetti squash halves and create our own unique boat, complete with masts and flags, and stick-person crew. Then we would put them in the water and race them to the bottom of the hill.  Winner got bragging rights.  You, too, can get bragging rights by making this dish. 


Oven Baked Zucchini Fries 
(with Heirloom Tomato Ketchup!)


These are AMAZING. They taste kinda buttery, too, and if you add Parmesan cheese, then they taste buttery AND cheesy. You can't lose. If I wanted to be SUPER healthy, I would serve these with my Spurgers. 


Cauliflower & Turnip Mashed Fauxtatoes 
(It sure BEETS the original. That's one for all you veggie lovers out there. I'm here all night.)


I make this all the time. Sometimes, if I'm feeling fancy, I'll add a beet so that they turn this awesome pinky colour which is really attention-getting, especially for a dinner party where you want your friends to be impressed and jealous of your mad kitchen skills. 

Want more? ------>   Follow Me on Pinterest

Sunday, January 27, 2013

The Cottage Gardener is now certified as a Bee Friendly Farm!

The Cottage Gardener is now certified as a Bee Friendly Farm!

Why did we decide to take this step? We've always grown organically and encouraged bees and other pollinators to visit our gardens. But we've noticed over the last few years that we are seeing fewer and fewer bees - both honeybees and bumblebees - visiting our crops and gardens. Upon doing a bit of investigation, we've discovered that all pollinators (and there are over 1000 species of pollinators in Canada!) are under serious threat. They're losing their natural habitats and their food sources due to increasing urbanization, industrial farming, monoculture and the increasing reliance on pesticides and herbicides. Bees are responsible for pollinating a large percentage of our food crops, so a loss for the bees is also a dangerous loss for us.

The Bee Friendly Farming initiative is designed to draw attention to the plight of our pollinators and encourage people to provide supportive habitats for bees and other pollinators. It's not difficult - there are many simple steps you can take to make your own garden more bee-friendly. I found it interesting that, for example, single-bloom flowers are better than double-bloomed ones and that bees' favourite flower colours are white, yellow and blue. Heirloom and native plants are particularly appropriate for pollinator plantings because of their flowers' simplicity, fragrance and - believe it or not - their pollen. Yes, modern breeders are starting to produce pollen-less flowers! Don't go there. Also be sure to have plants that flower in all three major seasons so that the bees have a constant source of food. Leaving parts of your land undisturbed encourages native bees as the vast majority are ground nesters.

Want to find out more? Visit Pollination Canada's site at http://www.pollinationcanada.ca/  for some great resource information.


Wednesday, October 17, 2012

Plant Profile: Ground Cherry


"Aunt Molly's Ground Cherries"

The first frosts of the season have arrived, the last of the seed crops have been pulled and are currently drying in the greenhouse and our ground cherries have finally succumbed to the cold. How I'll miss my daily forays out to them, peering under each plant for the fallen, ripe fruit nestled in the straw. Ground cherries have to be one of my favourite plants in the whole gardening world! What's not to love about a plant that's easy to grow, is largely disease-and-pest-free, produces prodigious quantities of incredibly tasty fruit and takes all the guesswork out of when to harvest?

Yet, more often than not, I'm met with blank stares when I offer it up to others. “What's that?” they ask suspiciously. Well, I tell them - it tastes really good; don't eat the husk; it's kind of like a tomato but not; try it – you'll like it! And they invariably do.

The ground cherry, also known as a husk tomato or cape gooseberry, is actually a relative of the tomato. Native to the eastern U.S., it has been cultivated in North America since the 17th C and was a staple in the cuisine of the Pennsylvania Dutch, who used them in soups, pies and preserves. I have never baked with them, as I like them much too much fresh from the garden. The tiny little 1/2” fruits have a solid flesh and are incredibly sweet. Each fruit develops inside a papery husk that turns brown as the fruit ripens. Because it's protected by the husk, the fruit is largely blemish-free and, once harvested, will store for several weeks inside the husk so don't remove it until you're ready to eat. The fruit has another unique characteristic: when it's ripe, it falls off the plant and onto the ground (hence the name). Harvesting is so easy – each day, I make the rounds of my plants and search under them for the fallen fruit. I find it's best to lay a solid layer of straw under and around the plants; that way, the fruits don't land on the ground and get dirty.

Ground cherries are prolific producers: 1 – 2 plants should suffice a family. The only real maintenance they require, I've found, is to watch for potato beetles. These insects like all members of the Solanaceae family and ground cherries are no exception. In early summer, they'll lay their eggs on the underside of the leaves and the hatched larvae proceed to feed on the leaves voraciously. However, I've found that a daily inspection of the plants for a couple of weeks will break the cycle. I turn over each leaf and remove those I find with either eggs or larvae. I then drop the leaves on the ground and grind them into the ground (I wear rubber boots for this, being the squeamish sort). The effort is worth it - once the cycle is broken, I find no other problems with the plants; they basically take care of themselves. Ours did well this summer despite a severe drought and were still producing loads of fruit until the hard frosts.

These plants are sprawlers, growing to 2' and spreading to 4', so give them a bit of room. They don't need staking, preferring to spread out over the ground. They like full sun. Like tomatoes, they need to be started from seed indoors 4-6 weeks before the last frost. They're not frost-tolerant, so transplant them outdoors after all danger of frost is over. 'Aunt Molly's', the variety we offer, has orange-yellow fruits and has a taste reminiscent of tangerines. It's renowned for its flavour and productivity!
Follow Me on Pinterest

Monday, October 1, 2012

Nature vs. Nurture, or "Back off, bunny. Get your own garden."

When I first moved out to the 'burbs, I was so excited to finally have some green space! I was even more excited to discover a little baby bunny living underneath our deck – I fed it carrots and lettuce. And then there were these adorable squirrels and chipmunks! Such delightful creatures – I fed them cashews and sunflower seeds. One night, I looked out my dining room window to see a fat raccoon sauntering down the sidewalk without a care in the world. “Keep on keeping on, little scrounger,” I thought with a smile.

How naive I was.

I see these woodland creatures differently now. They are mini mongrels, set to eat my Orach and steal my squashes while I sleep.

At first, I noticed dig marks in my freshly seeded beds. Then I noticed that my turnip greens looked nibbled on. But the final straw came when I noticed deep gashes in the skin of my baby Delicata squash. That's too far. You do not get in the way of a woman and her winter squashes.

The first thing I tried was to put up barriers. I collected sticks and branches and laid them over top of my containers to try to deter the dirty little culprits. Surprisingly, this was somewhat successful. It kept the raccoons at bay long enough for the little seeds to germinate and stand on their own. For the starter plants I had (pepper and ground cherry), I put tomato cages over the small plants.

But the dig marks in the raised beds were more tricky. I had heard that bone meal was a good deterrent, because it made the ground smell like death to the animal nose and, naturally, that's not very appetizing. I generously tossed the bone meal into my gardens. I was happy to discover that it did not smell like death to the human nose. It seemed effective for about a week. But once my squashes in particular started to bear fruit, it was too tempting to the raccoons and bunnies and other little nibblers. They braved the stench of death and carried forth to scratch up my squashes.

Finally, I acquired some row cover – a thin, breathable, opaque covering that basically acts is a blanket for my gardens. Bonus points: it raises the temperature of my raised beds by a couple of degree, says Dad, so my late season plantings have a bit more time to cook.

So far, using the row cover has been the most effective way for dealing with my hungry late-night visitors. It's my own fault, to a degree. I encouraged these little beasts, with my sweet voice and delicious vegetable choices (because as we all know, heirlooms taste a gazillion times better than any of the hybrid, grocery-store veggie fare).

Hopefully the woodland creatures and I can share this green space peacefully... as long as they leave my squashes alone.

Monday, September 17, 2012

The Best Laid Plans... Require My Mother (Reflections from a First Time Gardener)


Growing up, I would sometimes join my parents at their seed shows to help out. I figured I’d do some cash sales, hang out with the folks, maybe they’ll buy me a hamburger later - you know, easy peasy!  After my first jam-packed Guelph Organic Conference, I knew this wasn’t gonna be easy. I was being asked questions, like “What was this?” and “How do I grow this?” and “Why don’t you know what zone this is appropriate for?” I would stare back at the inquisitive soul, smiling, completely at a loss for words. Sure, if asked, I could sing the entire score of The Phantom of the Opera on the spot to this gardening aficionado , but tell them which tomato is good for making sauce? Oh heavens no. You need to ask my mom. So to assist our customers best, I made myself a name tag that said, “I’m friendly but useless. Ask my mother.”

Fast forward to this year, and I’ve officially joined my parents at The Cottage Gardener handling a lot of administration and customer relations. Slowly but surely, I am learning about dirt and all the wonderful things you can do with it. And with the new house I had just purchased with my new husband, I knew what I had to do: build my first garden .I surveyed my yard. Typical, suburban greenery. Easy, right?

I made my garden plan and proudly showed it to  my mother. She looked at my plan: squash, herbs, tomatoes, ground cherries, and peppers. She paused. "Can I dig now?" I asked her, impatiently. She smiled - uh oh - and began to explain the litany of things I needed to consider. What is my soil quality? (Cement-like) How much sun do I get? (6 hours - a good thing) How far apart was I going to plant things? (I needed more room) What tools do I already have? (Tools, you say?)

I redid my garden plan. Four raised-bed 4x6 gardens, plus some containers for last minute things I just couldn’t resist growing. To fix my soil, I carted home bins full of compost dirt from my parent’s house every night after work. I made a detailed shopping list for these "tools" she spoke of and on a Friday in May, my husband and I trekked off to Canadian Tire - plan in hand. There we stood in the Gardening section, amidst all the tools and gnomes and decorative pots. The pressure was on. I had to make some snap decisions in Aisle 12. After living in a box in the sky in downtown Toronto for many years, I was ill-equipped to navigate this enticing but confusing section of the store.


For example:


1) Question: Do we get a wheelbarrow?  
Considerations: My husband wanted it.
The Final Decision: I said no. “Our yard is so small, and the wheelbarrow is so expensive!”    
The Repercussions: The grueling task of carrying load after load of discarded weeds across our yard in a old laundry hamper.

2) Question: Which of these pole-like tools should we get?  
Considerations: I’m very short.
The Final Decision: Purchase the tiniest shovel in the world. “I’m tiny and this shovel is tiny and it’s so cute!” I say.
The Repercussions: After several hours of digging up the raised beds, I look to the sky and cry, “Why why why did I pick the tiniest freakin’ shovel in the world?! This is so hard!” Painful regret. Even a tiny person needs a big shovel in this world.

3) Question: We need to till the garden. Should we get the The Garden Claw?
Considerations:  “I’ve seen this on TV!”, I say with excitement. “It looks amazing!”
The Final Decision: Made for TV means made for me!
The Repercussions: It was too tall for me to use. In fact, I would shove it in the ground and then could do acrobatic balancing work on it because that thing was NOT gonna move. Oh yes, it’s all fun and acrobatics until someone breaks The Garden Claw.  Which I did, trying to be funny.  


And outside we went, our loot in tow. After three hours of exhausting work just harrowing the garden, we took an omelette break. Back to it. Three more hours. It was getting late and the sun was waning. I stood up to assess our work and a furrow came across my brow. With a whimper, I dropped to my knees and dug my hands into the dirt and looked up at my husband with glassy eyes, “Isn’t this supposed to look like dirt? How the hell are we supposed to turn this grassy mess into nice brown dirt? This should look like dirt. This isn’t dirt.”

After a moment, I knew what to do. I took a picture of our gardens so far and sent it to Mom.  “Is this right?” I texted her. “Yes! Everything looks good! You did it!” she texted back. I smiled, relaxed, and looked upon our gardens with satisfaction. See? I just had to ask my Mom.

 Follow Me on Pinterest

Tuesday, September 11, 2012

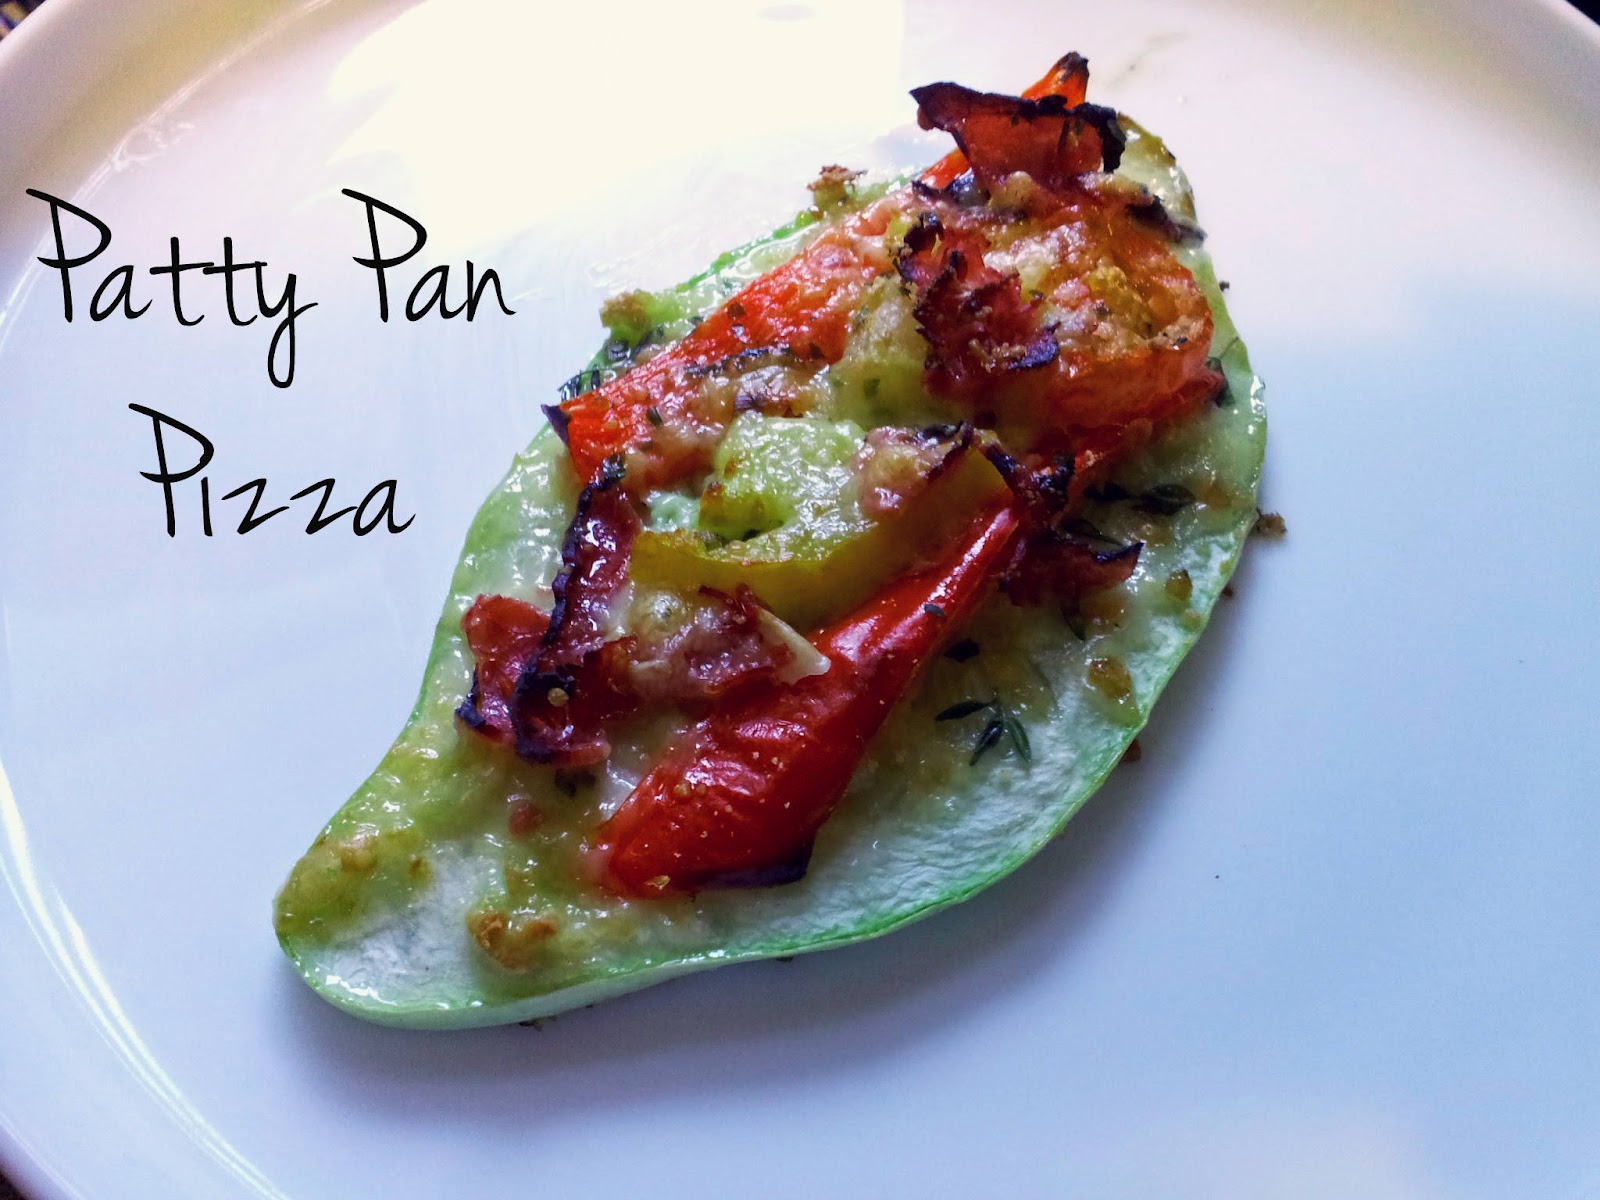
Cooking with Heirlooms: Patty Pan Pizza


I might have the best job in the world. The other day at the end of the workday, my mother comes to me, in her hands this gorgeous green thing – Benning's Green Tint Squash – a perfect patty pan squash. “Would you like to take this home?” she asked. Do I want to take it home? Has she met me? Of course I do!

Side note: When I first started working here, I stood before the wall of 700 varieties of seed, trying to fill an order for Cocozelle Zucchini. Minutes passed and I was frustrated (patience was never one of my virtues), “Where is the zucchini?” I called out. “It's in the summer squash.” my mom called back. Well, that doesn't make any sense, I thought to myself. At least another month would pass before it was explained to me that summer squash and zucchini were the same things. Oh dear.

Back to the patty pan squash. If you've never seen these before, you'll be amazed. They are beautiful, colourful round squashes with scalloped edges. “What do I do with it?” I asked her. “Well, I usually chop it up in a stir-fry. What else do you think we could do with it?”

With our creative thinking caps on, we came up with the Patty Pan Pizza.

Ingredients

1 Patty Pan Squash, sliced into ¼ inch thick pieces.

¼ Teaspoon Extra Virgin Olive Oil

2 Small Heirloom Tomatoes (I used Morden Yellow and Pomme D'Amour)

1 Heirloom Sweet Pepper (I used Marconi Red)

¼ Cup Extra Old Cheddar Cheese (Mozzarella could work too – but this cheese is my personal favourite)

2 Tablespoons Parmesan Cheese

1 Teaspoon Summer Thyme

… and any other pizza toppings that suit your fancy! I added Montreal Smoked Meat to mine for a bit of a protein boost.

Directions
  1. Preheat oven to 375 c
  2. Lightly grease a baking sheet with olive oil
  3. Lay squash slices out on baking sheet
  4. Add your toppings
  5. Cook for 10 – 15 minutes, or until cheese is slightly browned.
  6. Remove from oven – enjoy!


    Follow Me on Pinterest

Monday, September 3, 2012

Grower Visit: Feral Fields Farm

Dan and I recently visited one of our growers – Bethany and Sebastian from Feral Fields Farm. We met Beth and Seb when they were students in Fleming College's Sustainable Agriculture Program, in which we are adjunct faculty teaching seed-saving. They caught the seed-saving bug and contacted us after they graduated to explore grower opportunities with us. 
Heading to the barn


Bethany and Seb are currently growing lettuce seed for us and we recently took a day trip to take a look
at their crops. Since they don't have land of their own yet, they have a unique arrangement with Green Being Farm, outside Neustadt, Ontario – they work half the week for the farm in exchange for a section of land to farm for themselves the other half of the week. Since access to land is one of the biggest challenges for young farmers, I think we need to encourage more innovative arrangements such as this one. They have named their operation “Feral Fields Farm”. Currently, they are focused on market gardening with a small CSA, bee-keeping, chicken and duck raising and seed crops. They are also starting a small orchard of native nut trees (a long, long range plan!).

I love visiting our growers: we get to see first-hand how they are growing our seed crops, we discuss tips and techniques for getting a good seed harvest and it gives us an idea of the size of harvest we can expect. We believe in building our relationships with our growers – it enriches us all. We also always come away with a few ideas ourselves that we tuck away for future reference. In Seb and Beth's case, we found them using a neat type of electrified netting to protect their flocks and their crops. The whole netting is electrified and it has smaller holes at the bottom to prevent chickens from sticking their heads through it. Its chief attraction, though, is its portability. It's very light and can be moved easily by just pulling up the stakes. It's also expandable so it's perfect for pastured flocks that need to be regularly moved. 

Portable electric netting in the background


They also use the netting around their market garden, as it's a fair distance from the farmhouse. We're thinking of trying it around our corn, powered by solar, to protect it from raccoons since nothing else has worked!

 
Examining the lettuce seed crop. This is Brune d'hiver, a rare French heirloom. We originally obtained the seeds from France & have been growing it out to get a sufficient  seed crop. This year we were able to hand it over to a grower for larger scale production. You can see the protective garden netting in the background. 


Bethany & Seb are also growing some seed crops for themselves. This is dill gone to seed, which they'll harvest for planting next year. By the way, Dan really was there, too – but someone has to take the pictures!


Green Being Farm, which is “hosting” Feral Fields this year, is an interesting farm unto itself. The owners, Tarrah Young and Nathan Carey, specialize in pastured livestock and a winter CSA. This combination allows them to focus on their animals in the spring and early summer and their market garden in late summer/fall. Running a winter CSA means growing a lot of crops that can be stored during the winter, such as turnips, carrots, beets, onions and squash. This means you need a fairly large cold cellar for crop storage. Tarrah and Nathan came up with a brilliant idea – they used the old in-ground pool on the property! Covering it with a roof gave them an instant HUGE cold cellar that has worked beautifully.

The in-ground pool cold cellar. My favourite part: the stairs!


Dan and I have an old above-ground pool that years ago we turned into an above-ground pond. The kids had grown up and left home and we had no further use for the pool. So we stopped adding pool chemicals and just let nature take its course. Within a short time, frogs had taken up residence. Dan put objects into the pool that allowed the frogs to get out and sunbathe and, lo and behold, we had a little ecosystem. Now there's a whole frog community in our “pond” and on spring nights, the cacophony of mating calls is enough to make me wonder why the neighbours don't complain of noise violations! I love it – there's nothing better than falling asleep to the myriad sounds of frogs “ribbeting” (and our mosquito population has declined significantly!).


Follow Me on Pinterest

Saturday, August 4, 2012

It's Tomato Hornworm Time!


It's Tomato Hornworm Time!

I spotted my first tomato hornworm the other day – oh joy of joys. Well, actually, I only spotted it after Dan pointed it out to me; he's got the eagle eyes in the family and you sure need sharp visual acuity to find those little devils. Not so “little” really – at up to 4” (10 cm), tomato hornworms are one of the largest insect pests you'll deal with if you live in southern Ontario and Quebec. 


Even though they're big and scary looking, I always feel somewhat conflicted about taking them out. You see, the tomato hornworm caterpillar is the larva of the hummingbird moth (Manduca quinquemaculata), which I happen to really like. I really like my tomato plants alive and bearing fruit, too, so I apologize to the caterpillars as I eliminate them because you can't have both.

The moths emerge from the soil in spring after they've overwintered. They lay their eggs on the leaves of host plants and, after a few days, the larvae emerge and start eating voraciously for the next four weeks. They then bury themselves in the soil to start the cycle again. The larvae that hatch from the second generation of moths eat into the fall and then burrow into the soil to overwinter in cocoons.

Although they're most commonly called tomato hornworms, these caterpillars actually feed on any of the members of the solanaceae family, including peppers, potatoes, eggplants and nightshade. Tomatoes are their favourites – they eat the leaves and stems, as well as both the green and ripe fruit. Left alone, they can destroy a plant in a number of days. This is why they're considered so destructive and why we need to be constantly checking for them starting around now. You know you have hornworms if you notice whole branches of your tomato plants have been stripped bare of leaves, or if you see their telltale clusters of brown/black droppings on lower leaves. The caterpillars themselves are green (I have also found black ones) with white v-shaped lines on their sides and a black horn on their tail end. This horn looks dangerous but it doesn't sting. They blend in well with the plants, often hanging upside down along a stem, and I have to train my eyes to find them each season. They really are quite frightening the first time you encounter them, and these guys have attitude. Often, when I try to pick them up, they'll rise up and threaten to attack me, making a clicking sound.

Because hornworms dislike the heat of mid-day and will rest in the lower levels of the plants, the best time to look for them is at dawn or dusk, when they're feeding on the upper stems. Hand-picking them, although tedious, is the best way to get rid of them. Disposing of them can be done by squishing them with your (booted) foot (Dan's preferred method), cutting them in half (ugh!) or dropping them in a container of soapy water (my choice). Parasitic wasps can help you out: they lay their eggs on the larvae and their young feed on the host hornworm and then pupate in white cocoons on its back. So, if you find a hornworm with a lot of what look like pieces of rice on it, leave it alone. Those wasps, when they hatch, will also feed on other hornworms in the vicinity.

A couple of prevention techniques include tilling the garden well in the late fall and spring to unearth the pupae and planting marigolds, borage, basil or dill as companion plants. We now till our gardens every fall and have noticed a significant decline in the number of hornworms munching on our tomatoes in the last few years. They can still cause a fair amount of damage, though, so it's off to the garden every day to do our check.

Follow Me on Pinterest

Tuesday, July 31, 2012

Plant Profile: Yellow Horned Poppy


Plant Profile:  Yellow Horned Poppy (Glaucium flavum)


I noticed, during my garden walk the other day, that my Yellow HornedPoppy had seedpods that were ready to pop. Now if you're into seedpods, as I am, those on the Horned Poppy are an absolute delight. First of all, they are long – really long, as in up to 12” (30 cm) and almost as narrow as the stem. When they first form and are green, it's hard to tell where the stem ends and the seedpod begins. However, it's very easy to tell when they're mature- the pods turn a dark brown and if they're ready, the pods will easily snap off the stem; if not, you can tug and twist with all your might and they won't budge. Opening the mature pods takes a simple twist and the seeds literally fall out. And there are so many of the tiny, little things! They run up and down the whole length of the pod – easy to figure out why this plant is a self-seeder.
 Long, curvaceous seedpods!
I can't figure out why this plant is not more common in gardens. There is so much to love about it! The foliage itself makes it garden-worthy: the highly-dissected leaves are a bright silvery- blue and grow in a lush mound, providing visual interest all season. The pale yellow flowers on 24" stems are produced in abundance continually from July to September and as the flowers fade, those incredible seedpods begin to form. All in all, it's quite the conversation piece. On top of that, it's a pretty low-maintenance flower, growing best in poor soils, and it can handle variable growing conditions, including drought.

The Horned Poppy has a long history of cultivation. A native of the coasts of much of Europe and the Mediterranean, it was a cottage-garden favourite for hundreds of years and was grown extensively in England and Ireland. Gerard described it in the 16th C. Immigrants brought it with them to settle the New World and it flourished here, naturalizing along the eastern U.S. coast. Settlers did discover, 'though, that our harsh winters necessitated growing it as an annual rather than the short-lived perennial it is in Europe. An 1827 Ontario seed catalogue lists it as one of their offerings of annual flowers. Mine, however, have survived milder winters in our Zone 5b gardens.

To grow the Horned Poppy from seed, start it indoors in winter. The seed benefits from stratification (which means providing it with a cold spell to break dormancy), so after pressing the seed into moist, soil-less mix and lightly covering with mix, place a plastic baggy over the top and place it in the fridge for 6-8 weeks. Then remove the pot from the fridge and place it under lights. Or if you're lazy like me, simply place the pot of sown seeds outdoors in winter in a sheltered spot (without the baggy!) so it can experience the normal freeze-thaw cycles.


Follow Me on Pinterest

Monday, July 23, 2012

Plant Profile: Good King Henry


Good King Henry (Chenopodium bonus-henricus)

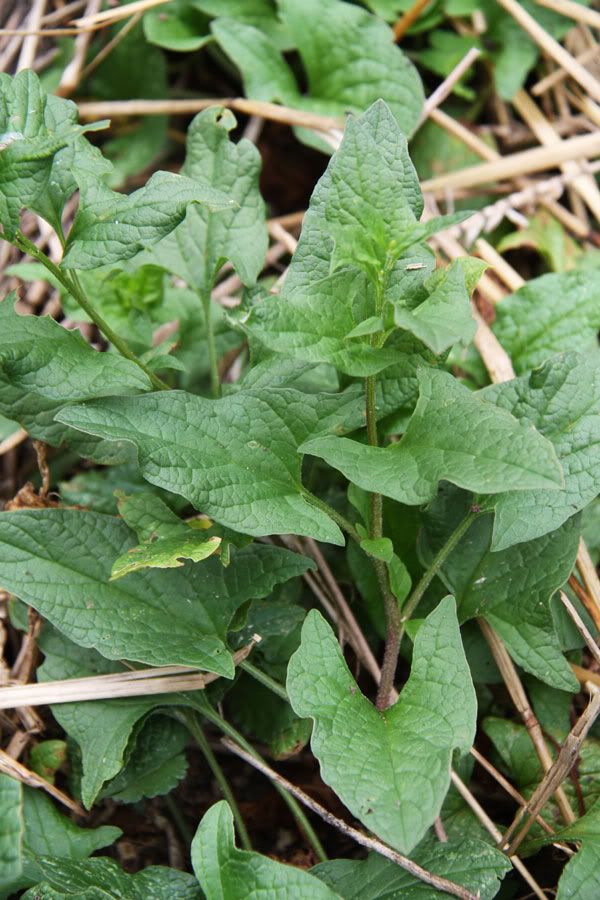
I'm really excited to have harvested our first organic seed crop from our Good King Henry plants! Here are some interesting facts about this rarity of rarities in cooler climes - a perennial vegetable.


Despite its illustrious name, this venerable plant served the peasant class in Europe for hundreds of years. Known also as" Poor Man's Asparagus"," Lincolnshire Spinach", "Allgood", "Fat Hen", "Smear-wort" and "English Mercury", it was valued as a spinach and asparagus substitute and pot-herb. Its species name means “goosefoot”, which refers to the shape of its leaves, and it's related to other edibles such as Lamb’s-quarters (C.album), quinoa (C. quinoa) and StrawberrySpinach (C. capitatum).

Although it was a garden staple in much of Europe from the time of the Romans, it fell into disuse by the early 1900's. However, with the recent surge of interest in home vegetable gardens and slow cooking, it's time to take another look at this plant: it's a perennial vegetable (to Z 5), is relatively easy to grow and largely resistant to pests and diseases. Its common name is believed to have originated in Germany as simply “Good Henry”, meant to distinguish it from “Bad Henry”, a toxic plant found in the wild.  “King” seems to have been added when it came to England (no-one knows quite why) and many myths developed around the source of its names, including that it was named after Henri IV of France, who had promised every peasant a chicken or fat hen in his pot. “Fat Hen”, by the way, referring to its use as poultry feed, is actually a misnomer – it's meant to apply to its cousin, Lamb's-quarters, which were the species used to fatten poultry. The second half of its botanical name translates simply as“good henry” - although the bestowed royal connections may have appealed to the commoner's fancy.

Prized as one of the first greens to emerge in spring, its young shoots were harvested, peeled and cooked like asparagus and the leaves were picked regularly for use as a pot-herb. So important was it considered that European colonists brought it to North America with them to establish in their new gardens.

Growing to about 12” high and 18” across, it first produces young shoots in early spring that can be harvested when pencil-thick and cooked like asparagus. The dark-green, triangular leaves next appear and can be continually harvested, although older and later leaves tend to be more bitter. We have discovered why it was so popular as a pot-herb, as even the young leaves are a bit too bitter for fresh eating for us. Why fight history? The peasants had it right – so cook it as you would spinach or stir-fry it as we do. The bitterness can be reduced by soaking the leaves for a half hour in salted water, then discarding the water. They are especially rich in Vitamin C, calcium and iron, so they're a great addition to your diet.

Like most ancient garden plants, Good King Henry also had medicinal uses. According to “A Modern Herbal”, written by M. Grieve in 1931, it had “excellent remedial qualities in indigestion” and the seeds were considered to have a mild laxative effect.All parts of the plant were used. The name “Smear-wort” comes from its use in ointments and the leaves were regularly made into poultices to clean and heal chronic sores. Gerard, in the 16th C., wrote that these poultices “do scour and mundify” sores resistant to healing ("mundify" - what a great word! It means to cleanse - I'm going to try and work that into my vocabulary). The roots of the plant were even used to feed to sheep to cure coughs.

Since it is a perennial, Good King Henry is best planted in rich, fertile soil that has been well-worked with good drainage. We have ours in full sun and it has flourished although it can also handle partial shade. Growing it from seed can be a challenge as it is a slow, erratic germinator. Moist-stratifying the seeds for several weeks before sowing increases germination rates. It doesn't like to be transplanted, so sow it where you mean to grow it. Like many plants that are trickier to germinate, they self-seed quite readily once established. This is a good thing, since we have found that in our Zone 5b garden it can tend to be a short-lived perennial. Direct sow in the garden and thin to 2' apart and don't harvest anything the first year – just let the plant work on getting established. Shoots should not be harvested until the plant is three years old. The fairly nondescript flowerheads are produced in abundance and if you leave some to dry on the plant you can gather your own seeds fairly easily. All members of the Chenopodiaceae family are outbreeders and wind-pollinated, meaning they have to be isolated by several miles to ensure varietal purity. However, Good King Henry is the only known variety in its species so saving pure seed should not be a problem. Wait until the seedheads are completely dried before harvesting the tiny black seeds.We just run our hands up the stalks and the seeds, if ready, easily come off into our hands. Cleaning the seed is easy - just blow off any chaff.


Follow Me on Pinterest